Introduction
Learn to leverage the power of signatures in Mail. This guide will show you how to create your first signature, which will be automatically added to every email you send from your laptop.
-
-
The fastest way to open an application is to press 'Cmd Space bar' at the same time, and start typing the application name in the search box (top right of your screen)
-
-
-
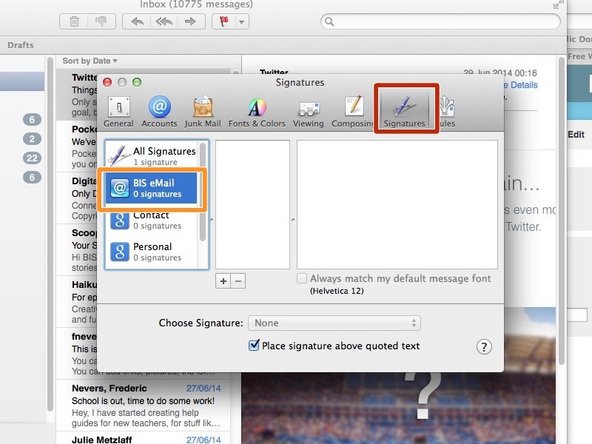
Click on 'Signatures'
-
Click on 'BIS eMail'
-
-
-
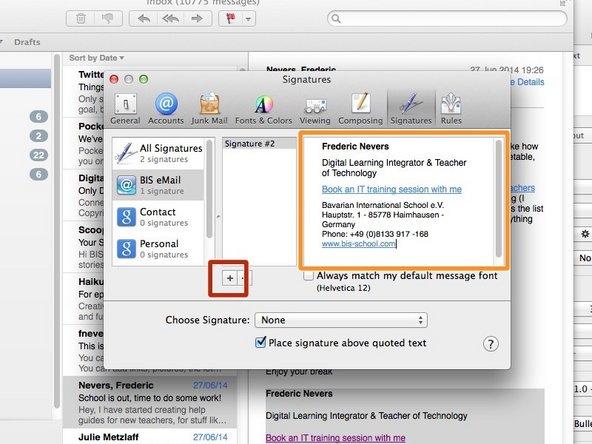
Click on the '+' icon
-
Type your signature here
-
It's easiest to first type your signature in a dedicated word processing application, such as 'Pages', to type your signature and then simply copy and paste it to your Mail application
-
-
-
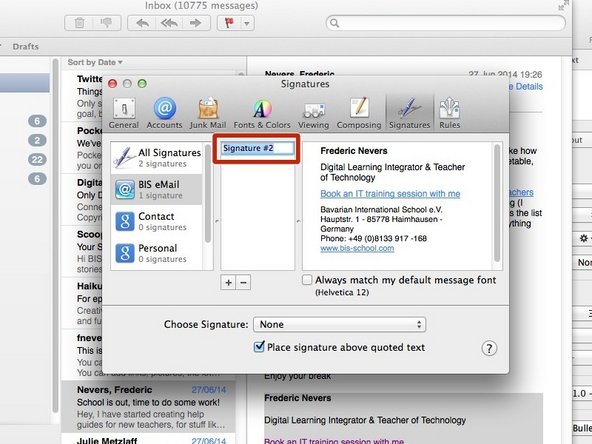
Double click on the 'Signature #' and choose a name for your signature
-
You have the ability to save different signatures for different purposes, so it's important you name each something that makes sense to you e.g. parents, students, basic, etc.
-
To add more signatures, repeat the process from step 3
-
-
-
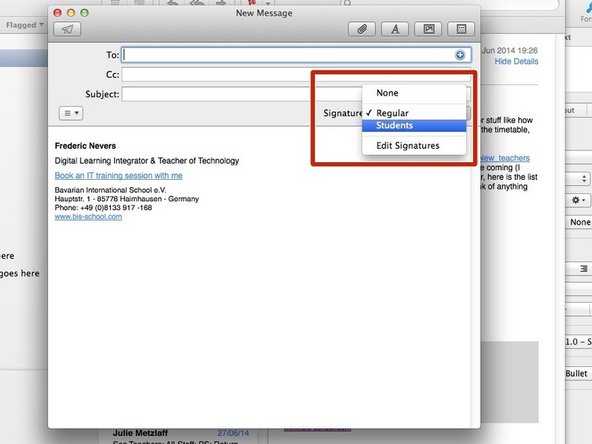
When you type an email, your email application will automatically add the top-most signature to your new emails. If you wish to select another signature, click on the drop down box named 'signature' in your new email window
-


